

Table of Contents
- Why Base Cards Are the Best Material for Baseball Card Art
- Essential Tools and Safety Gear for Cutting and Gluing Cards
- Baseball Card Mosaic Techniques for Beginners
- Best Adhesives for Trading Card Art: A Compatibility Guide
- 3D Layering and Collage: Turning Fragments Into Depth
- How to Preserve Vintage Baseball Cards in Your Artwork
- Framing, Displaying, and Upcycling Finished Pieces
- Conclusion
- Frequently Asked Questions
Last Updated: September 11, 2026
Why Base Cards Are the Best Material for Baseball Card Art
Most collectors overlook the obvious: the cards filling your shoeboxes are perfect raw material for transforming old baseball cards into art. Base cards and common cards, the mass-produced ones worth pennies, offer clean edges, consistent card stock, and decades of visual variety that modern reprints can't match.
The same principle applies here: the cards nobody wants are often the best canvas. A 1988 Topps common with a crisp photo and bold team colors cuts better than a glossy modern insert. Vintage cards also carry faded color palettes and soft textures that give finished pieces a nostalgic, worn-in look you simply can't fake.
So before you hunt for expensive singles, sort your commons first. Those are your building blocks.
Essential Tools and Safety Gear for Cutting and Gluing Cards
Precision tools matter more than expensive ones. An X-Acto knife with a fresh #11 blade, a self-healing cutting mat, metal ruler, and detail scissors cover 90% of card crafting. For gluing, keep acid-free glue sticks and archival-safe liquid adhesive on hand.
Safety gear isn't optional here. Card stock is thin, blades slip, and repetitive cutting strains your hands.
- Cutting: X-Acto knife, #11 blades, self-healing mat, 6-inch metal ruler
- Safety: Cut-resistant gloves, safety glasses, a well-lit work surface
- Gluing: Acid-free glue stick, archival liquid adhesive, fine-tip applicator
- Finishing: Tweezers, bone folder, sealant or epoxy resin
Replace blades the moment they drag. A dull blade tears card stock and forces you to press harder, which is exactly when accidents happen. Consumer Product Safety Commission guidance on craft knife safety recommends keeping blades retracted when not in use and cutting away from your body.
Baseball Card Mosaic Techniques for Beginners
Baseball card mosaic techniques start with one simple rule: cut first, arrange second, glue last. Lay out your fragments on a backing board before committing any adhesive. This lets you adjust composition without ruining cards.
Beginner mosaics work best with a limited palette. Pick three to five colors from your cards (team reds, blues, whites) and build a simple image: a team logo, a jersey number, or a stadium silhouette. Cut fragments into roughly uniform squares or irregular shards, depending on the texture you want.
A common mistake is gluing as you go. Once adhesive sets, you can't shift a fragment without tearing it. Arrange the entire piece dry, photograph it, then glue in sections.
Best Adhesives for Trading Card Art: A Compatibility Guide
The best adhesives for trading card art depend on one variable above all others: whether the card face is coated or porous. Glossy, resin-coated cards from the modern era reject water-based glue and cause it to bead and lift. Matte vintage stock drinks it in, swells, and wrinkles. Match the adhesive to the surface and most of the problems hobbyists blame on "bad glue" disappear.
| Adhesive | Best For | Avoid On | Dries Clear | Reversible |
|---|---|---|---|---|
| Acid-free glue stick | Flat collage, paper-to-paper, matte stock | Glossy or coated cards | Yes | Partly |
| Archival liquid adhesive (PVA-type) | Mixed media, porous card stock, backing boards | Resin-coated surfaces | Yes | No |
| Double-sided archival tape | Clean layering, no mess, glossy cards | Textured or torn edges | Yes | No |
| Repositionable spray adhesive | Large background sheets | Small fragments, anything you want flat | Yes | Partly |
| Epoxy resin | Final seal, 3D depth, functional items | Unsealed porous card stock | Yes | No |
Why glossy cards fail with water-based glue
The glossy coating on most cards from the late 1980s forward is a thin polymer film. Water-based adhesives can't penetrate it, so they sit on the surface, skin over, and then release when the piece flexes. The fix is either a solvent-based adhesive, a tape, or a light scuff of the back of the card with fine sandpaper to give the glue something to grab.
Why vintage matte cards curl
Uncoated card stock is hygroscopic, meaning it absorbs moisture from the air and from the adhesive itself. A glue stick lays down water, the paper fibers on the glued side swell, and the card cups toward the dry side. Two mitigations: use the thinnest possible film of adhesive, and weight the piece flat under a book or board for at least an hour after assembly.
The scrap-card test
Before committing a real card, run a two-minute test on a duplicate or a common you don't care about:
- Apply the adhesive to a scrap of the same card stock.
- Press it to a piece of backing board.
- Wait 24 hours.
- Check for curl, bleed-through on the printed face, and whether the bond holds when you flex the board.
If the scrap curls or the print discolors, switch adhesives before you touch the real piece.
Sealants and yellowing
Sealants protect the surface but can also cause the problem they're meant to prevent. Solvent-based clear coats can yellow over time, and some spray sealants react with the inks on older cards. Water-based acrylic sealants are generally the safer choice for paper, applied in two or three thin coats rather than one heavy one. Epoxy resin gives the hardest, clearest finish but is permanent and adds weight, so reserve it for functional items like coasters and keychains rather than framed wall art.
Library of Congress guidance on archival adhesives and preservation outlines which materials are safe for long-term paper preservation.
3D Layering and Collage: Turning Fragments Into Depth
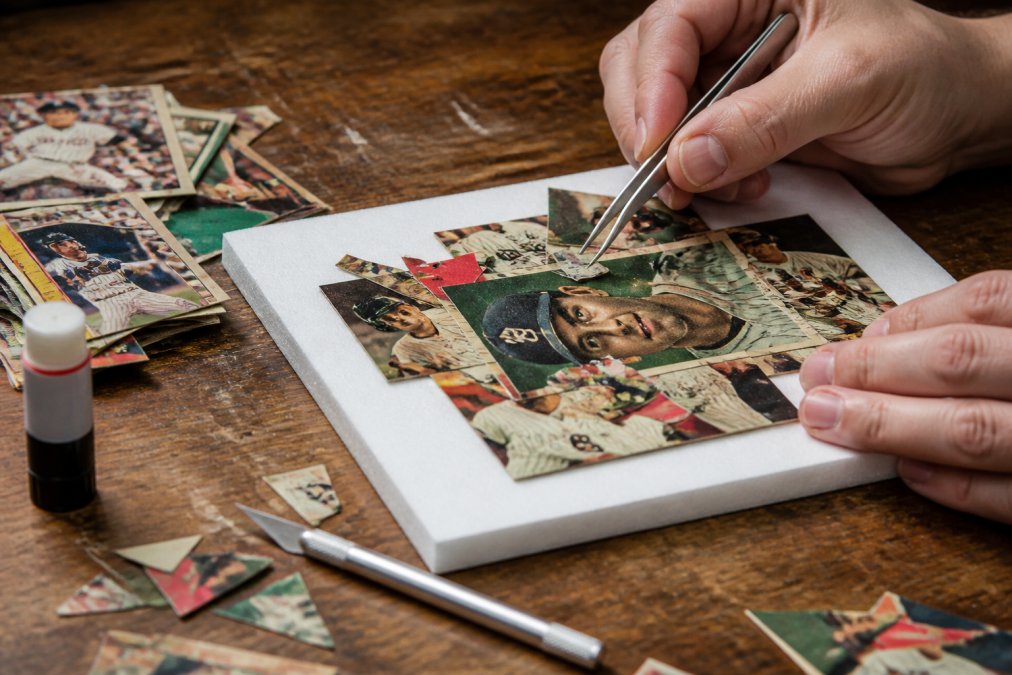
Most card-art content stops at "stack the pieces." This is the technical version. Depth-layering is a measured build, not a freehand one, and the numbers below are what separate a piece that reads as dimensional from one that just looks glued down.
Pick a depth budget before you cut
Decide the total relief first, then work backward. A practical range for a framed piece is 1/8 inch to 3/8 inch of total depth. Anything past 1/2 inch usually needs a shadow box rather than a standard frame, because the glass will press the top layer.
Assign each layer a thickness:
- Base layer: flat, glued directly to the backing board (0 inch relief)
- Mid layers: 1/16 inch foam tape or two stacked card-stock shims
- Top layer: 1/8 inch foam tape, or 3/16 inch if you want a strong cast shadow
Three to four layers is the sweet spot. Five is the practical ceiling before the stack gets top-heavy and the top piece starts to sag under its own weight.
The cutting sequence
Work from the largest element to the smallest, and cut every layer from a different copy of the same card so the print registration lines up.
- Layer 1 (base): cut the full figure or full image with a 1/8 inch border of background left on. This border hides the seam where the next layer sits.
- Layer 2: cut the same image down to the torso and head, trimming 1/16 inch inside the layer-1 outline so the lower layer's edge stays visible.
- Layer 3: cut to the head and shoulders only.
- Layer 4 (optional): cut to the face, or to a single detail like a cap logo or jersey number.
That inward trim on each successive layer is the mechanism that creates the stepped, shadowed edge. If you cut each layer to the same outline, the stack reads as a flat block no matter how tall it is.
Spacers and adhesive
Foam tape is the standard spacer. Use the thin, closed-cell craft foam rather than mounting tape meant for wall hooks, which is too thick and too aggressive. For very small elements like a face, cut the foam tape into slivers with detail scissors so the spacer doesn't peek out past the card edge.
Apply adhesive to the spacer, not to the card face. Press the layer down with a bone folder or the flat of a fingernail for a few seconds so the foam compresses evenly.
Mixed-media contrast
Flat decoupage in the background makes the raised layers read as more dimensional by comparison. Keep the background layers matte and the raised layers glossy, or vice versa, so the eye separates them by sheen as well as by height.
Common failure modes
- Curling: thin card stock absorbs moisture from liquid adhesive and cups. Use tape or a glue stick for the raised layers, and weight the piece under a book for an hour after assembly.
- Sagging top layer: the foam tape is too thick for the size of the piece. Drop to 1/16 inch or add a second, smaller spacer under the center of the top layer.
- Visible spacers: the foam is wider than the card element. Trim the tape to sit at least 1/16 inch inside the card edge on all sides.
- Crushed layers: the frame glass is pressing the top layer. Switch to a shadow box or add a mat spacer to hold the glass off the art.
How to Preserve Vintage Baseball Cards in Your Artwork
Preserving vintage cards means treating them as artifacts first and art supplies second. If a card has any collector value, don't cut it. Mount it intact on an archival backing and build the artwork around it.
For cards you do cut, seal the exposed edges. Raw cut edges absorb moisture and yellow over time. A light coat of archival sealant on the cut edge slows that process. If you're using epoxy resin as a topcoat, apply it in thin layers and let each cure fully before adding the next.
Store finished pieces away from direct sunlight. UV exposure fades card colors faster than almost anything else, and once a vintage card fades, there's no bringing it back.
Framing, Displaying, and Upcycling Finished Pieces
Framing protects the work and makes it display-ready. Use a shadow box for 3D pieces so the layers have room to breathe, and standard frames with archival matting for flat collages.
Upcycling goes beyond wall art. Card fragments work beautifully in functional items: coasters, keychains, luggage tags, and even small decorative trays. Seal these with resin so they hold up to handling. This is the same approach of turning stored-away collectibles into pieces you actually use every day.
For display, keep finished art out of humid rooms like bathrooms. Card stock warps quickly in damp air, and framed pieces trap that moisture behind glass.
Conclusion
The hardest part of transforming old baseball cards into art isn't the cutting or the gluing. It's deciding which cards to sacrifice and which to preserve. Start with your commons, test your adhesives, and build one small piece before committing a whole collection.
If you'd rather skip the workbench and own a finished piece, MoonlightWeave specializes in transforming vintage memorabilia into unique, handcrafted fabric goods and home accessories. Our collection features a diverse range of items, from cozy blankets and stylish luggage tags to functional home decor like doormats, clocks, and cutting boards. We offer high-quality, nostalgic pieces that allow you to celebrate your favorite sports and memories in your everyday life.
Continue shopping
Frequently Asked Questions
What are some cool things I can do with old baseball cards?
You can turn common cards into mosaic portraits, 3D layered collages, coasters, keychains, or framed wall art. Start by sorting out base cards and mass-produced cards that have little resale value. Cut them into strips or squares, then arrange them by team color or player image. For a first project, try a small mosaic of a team logo on a wooden panel using archival-safe glue.
How do I safely cut and mount baseball cards for art projects?
Use an X-Acto knife with a fresh blade and a self-healing cutting mat. Always cut away from your body and keep fingers clear of the blade path. For mounting, choose an archival-safe adhesive like PVA glue or double-sided tape designed for paper. Avoid rubber cement, which yellows over time. Work in a well-ventilated area if using spray adhesives, and wear safety glasses when cutting thick stacks.
What supplies do I need to start making baseball card crafts?
You need a cutting mat, X-Acto knife, metal ruler, archival-safe glue, foam board or canvas, and a variety of common cards. Optional tools include tweezers for placing small fragments, a bone folder for smoothing, and a sealant like Mod Podge or epoxy resin for finishing. Gather cards from junk wax era boxes, flea markets, or bulk lots. Keep a damp cloth nearby to wipe glue from your fingers.
How can I display repurposed baseball card art in my home?
Frame your finished piece with a mat that leaves at least 2 inches of border. Use UV-protective glass to slow fading. For 3D pieces, choose a shadow box frame. Hang away from direct sunlight and damp areas like bathrooms. If you want a functional display, mount smaller mosaics on coasters or tray bases. Rotate pieces seasonally to keep the display fresh and protect the cards from long-term light exposure.