

Table of Contents
- Why Repurpose Vintage Sports Jerseys
- Prepare Your Jersey Before You Start
- DIY Jersey Quilt Ideas
- Sewing Tips for Athletic Mesh Fabric
- Turn Jerseys Into Throw Pillows and Wearables
- How to Frame a Vintage Jersey
- No-Sew and Low-Skill Customization Options
- Care and Maintenance for Upcycled Jersey Projects
Why Repurpose Vintage Sports Jerseys
Vintage sports jerseys sit unworn in closets, holding memories but no longer fitting your life. The fabric is worn, the fit outdated, or the style no longer matches. Yet throwing away a piece of your sports history feels wrong. Repurposing transforms nostalgic memorabilia into functional, wearable, or decorative pieces you'll actually use. A faded hockey jersey becomes a throw pillow. A collection of mesh scraps becomes a patchwork quilt. An oversized baseball jersey transforms into a layering piece or shirt-dress. The team logo stays intact, the memories remain alive.
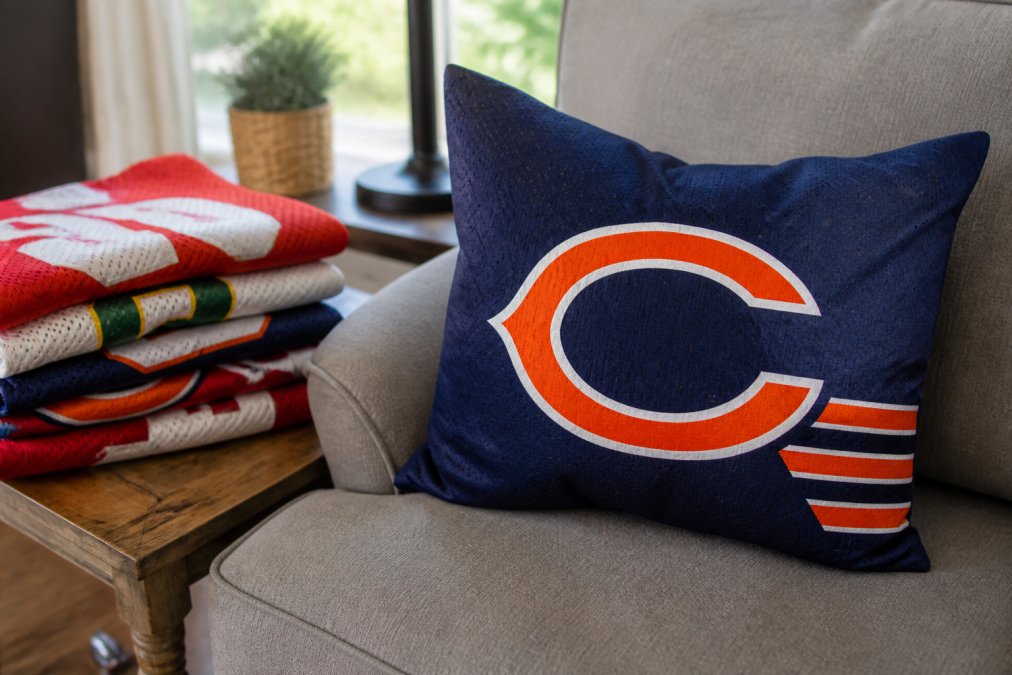
At MoonlightWeave, repurposing vintage jerseys creates one-of-a-kind pieces that mass-produced decor simply can't match. The handcrafted approach preserves exactly what matters most about each jersey while giving it new purpose. Whether you're working with a single cherished jersey or a stack of old team gear, the techniques in this guide will help you decide what to make and how to make it well.
Textile waste is a real problem, millions of pounds of fabric end up in landfills annually (the EPA). By repurposing what you already own, you extend the life of quality fabric and keep those memories in circulation instead of the trash.
Prepare Your Jersey Before You Start
Before cutting into anything, assess what you're working with. A jersey in rough condition might work beautifully as interior patchwork, while a well-preserved piece deserves a more prominent role.
Clean and Inspect the Fabric
Examine the jersey closely for stains, fading, holes, or deteriorated mesh. A small stain on the front might be hidden in a pillow back, while a hole in the sleeve could become a seam allowance. Understanding the condition helps you plan what the jersey can become.
Clean the jersey gently before starting any project. Use cool water and mild detergent; hot water can set stains and damage polyester and mesh fabrics (the FDA). Wash by hand or use a delicate cycle, then lay flat to dry. Never use a dryer, which can shrink athletic mesh and damage printed logos or embroidery.
Once dry, inspect the seams. Mesh fabric jerseys often have reinforced seams that hold up well over time. Check whether the original stitching is intact or if you'll need to reinforce certain areas when you cut.
Preserve the Original Design
The team logo, player name, or number is usually what makes a vintage jersey worth keeping. Plan your project around preserving these elements rather than cutting through them. If you're making a throw pillow, the logo should be the focal point on the front. If you're making a patchwork quilt, position logos so they're visible and centered in their fabric squares.
Consider whether the design is printed, embroidered, or stitched. Printed logos can crack if the fabric underneath is stretched too much. Embroidered designs are sturdier but need careful handling around the stitching. Heat-applied logos can peel if exposed to high heat during sewing.
If the original design is faded but the jersey is structurally sound, you can incorporate damaged areas into the interior of a project where they won't show, or embrace the worn look as part of the vintage aesthetic.
DIY Jersey Quilt Ideas
A patchwork quilt is one of the most rewarding ways to repurpose multiple vintage sports jerseys, using both featured logo sections and plain mesh scraps to create a quilt that tells the story of your favorite teams.
Planning Your Patchwork Layout
Decide on a finished size first. A throw quilt (roughly 50" x 60") works well for most couches and uses about 6-8 jerseys. Sketch a rough layout on paper before cutting anything.
The most common approach is a simple grid layout: arrange jersey squares in rows and columns, alternating logos with solid fabric pieces or contrasting colors. This creates visual rhythm and prevents the quilt from feeling chaotic. Think about color balance, arrange jerseys so colors are distributed evenly across the quilt rather than clustering all the reds on one side.
Measure your logo areas carefully. A standard jersey logo might be 8" x 10", while plain mesh sections could be cut into 4" or 6" squares. Consistency matters; if all pieces are roughly the same size, the quilt will look intentional.
Cutting and Assembling Fabric Scraps
Once you've planned your layout, start cutting. Use a rotary cutter and ruler for straight, even cuts. Mesh fabric can fray at the edges; consider using pinking shears to reduce fraying slightly, though some fraying adds to the handmade aesthetic.
Cut your jersey squares slightly larger than your finished size, typically 1/4" to 1/2" larger to account for seam allowance. For a 4" finished square, cut 4.5" squares.
Arrange your cut pieces on a large, flat surface to see the full layout before sewing. Take a photo of your layout so you can reference it while sewing.
Sew pieces together in rows first, then sew the rows together. Use a consistent 1/4" seam allowance throughout. Press seams to one side after each row to maintain structural integrity. Once all pieces are sewn together, you'll have your quilt top.
Sewing Tips for Athletic Mesh Fabric
Mesh fabric and polyester present unique challenges when sewing. These materials are slippery, prone to puckering, and can slip under the presser foot.
Needle and Thread Selection
Use a ballpoint or stretch needle (size 75/11 or 90/14) rather than a standard sharp needle (peer-reviewed research). Ballpoint needles slide between fibers instead of piercing them, reducing runs and snags in mesh. Stretch needles have a special scarf that prevents skipped stitches.
Match your thread to your fabric weight. Polyester thread works well with polyester mesh and won't snap under tension like cotton thread sometimes does. Use the same thread color in both the bobbin and the needle for consistent appearance.
Reduce your thread tension slightly. Mesh fabric doesn't need the tight tension that woven fabrics do. Too much tension causes puckering and can distort the fabric. Start with a tension setting of 4-5 and test on fabric scraps first.
Stabilizing Polyester and Mesh
Mesh fabric is stretchy and unstable, especially when cut across the grain. Use a walking foot (also called a dual-feed foot) if your sewing machine has one. This foot feeds fabric evenly from both top and bottom, preventing slipping.
If you don't have a walking foot, use tissue paper or tear-away stabilizer under the mesh while sewing. Place a strip of stabilizer under the seam line, sew through the mesh and stabilizer together, then tear away the stabilizer afterward.
For quilt seams, consider using a 1/4" quilting foot, which has a guide that keeps your seam allowance consistent. When sewing mesh to other fabrics, pin frequently and sew slowly. Rushing creates puckered, uneven seams that are hard to fix. styling vintage pieces.
Turn Jerseys Into Throw Pillows and Wearables
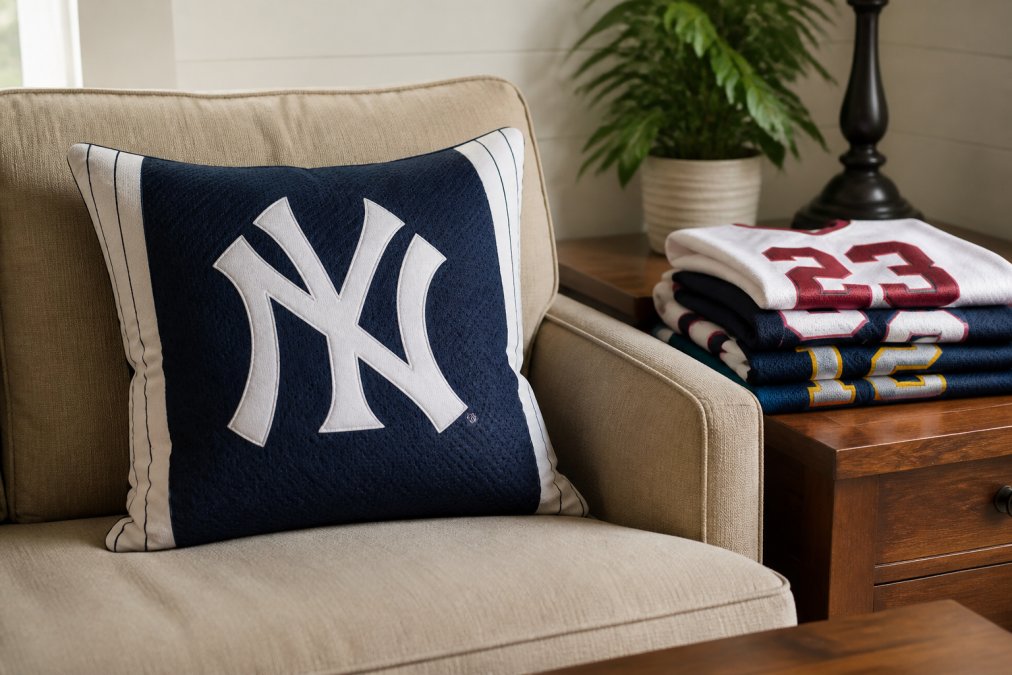
The simplest way to repurpose a single jersey is to turn it into a throw pillow, preserving the logo prominently while creating a functional piece for your home.
Creating Throw Pillows with Team Logos
A throw pillow consists of a front panel (featuring the logo), back panel (plain fabric or contrasting color), and stuffed interior. Cut a rectangle from the front of the jersey that includes the team logo. A standard pillow is 16" x 16" or 18" x 18" finished, so cut your front piece about 1/2" larger to account for seam allowance.
For the back, cut a matching piece from the plain mesh or use contrasting fabric like cotton. Place the front and back pieces right sides together. Pin around all edges, leaving a 3-4" opening on one side for turning and stuffing. Sew around three and a half sides using a 1/2" seam allowance.
Trim the seam allowance at the corners diagonally, then turn the pillow right side out through the opening. Use a blunt tool like a chopstick to push the corners out fully. Press the edges flat with an iron on low heat.
Stuff the pillow with polyester fiberfill, distributing evenly. Don't overstuff; a pillow should be soft and slightly squishy. Fold the raw edges of the opening inward and pin closed. Hand-stitch the opening shut using a ladder stitch, which creates a barely visible seam.
Styling Oversized Jerseys as Dresses and Layering Pieces
An oversized vintage jersey can become a comfortable shirt-dress or layering piece without much alteration. The mesh fabric is breathable, and the loose fit is fashionable in contemporary styling.
For a shirt-dress, the jersey simply needs hemming. Try it on and decide where you want the hem to hit, mid-thigh is typical for a casual dress. Mark the length with pins or tailor's chalk, then sew a simple straight seam.
For layering, oversized jerseys work best with fitted pieces underneath. Wear a vintage jersey over a long-sleeve fitted shirt or tank top. Mesh jerseys are particularly good for this because you can see the layer underneath. Consider cropping an oversized jersey if it's too long for your frame, cutting it to hip-length and hemming the raw edge.
How to Frame a Vintage Jersey
Framing preserves a special jersey as wall art while protecting it from dust and fading. This works best for jerseys too valuable or delicate to repurpose into wearables.
Choose a frame deep enough to accommodate the folded jersey without crushing it. Shadow box frames (typically 2-3" deep) work well. Use acid-free matting and backing; regular cardboard will damage the fabric over time.
Fold the jersey neatly, positioning the logo and number prominently. Use acid-free thread to tack the jersey gently to the backing, securing it at key points without piercing the fabric in visible areas. Add a label below the jersey noting the team, player name, and any significant details. Frame it with UV-protective glass to prevent fading from sunlight.
Hang framed jerseys away from direct sunlight and moisture.
No-Sew and Low-Skill Customization Options
Not everyone wants to sew. Several techniques let you repurpose a jersey with minimal sewing skills or no sewing at all.
Using Fabric Glue and Iron-On Methods
Fabric glue creates permanent bonds without stitching. Apply a thin, even line of fabric glue to the back of the piece you're attaching, press it firmly onto the base fabric, and hold for 30 seconds. Allow the glue to dry completely (usually 24 hours) before handling.
Iron-on patches and heat-activated adhesive tape offer another no-sew option. Cut a piece of heat-activated adhesive tape slightly smaller than the area you want to bond. Place it between two fabric pieces, then apply heat with an iron according to the tape's instructions. This creates a permanent bond without glue or thread.
For customizing a jersey without altering it structurally, iron-on patches work beautifully. Add a new patch over a stain, or create a collage of small patches across the chest or sleeves.
Embroidery and Patch Customization
Hand embroidery personalizes a jersey without requiring a sewing machine. Simple stitches like backstitch, running stitch, or French knots can add names, dates, or decorative elements. Use embroidery floss and an embroidery needle.
Patch customization is another simple approach. Sew or glue patches over worn areas, or add decorative patches to celebrate team achievements or personal milestones. Arrange them asymmetrically for a modern look or in a grid for a more structured aesthetic.
Care and Maintenance for Upcycled Jersey Projects
Once you've repurposed your vintage sports jersey, proper care keeps it looking good for years.
For throw pillows, gentle spot-cleaning works best. If the front features a printed logo, avoid scrubbing that area; blot stains gently with a damp cloth and mild soap. Never machine-wash a finished pillow; the agitation can damage seams and cause the filling to shift.
For quilts, hand-washing is gentler than machine-washing. Fill a tub with cool water and mild detergent, submerge the quilt, and gently agitate for a few minutes. Rinse thoroughly in cool water until no soap remains. Lay flat to dry; never wring or hang-dry a quilt, as the weight of water can stress the seams.
Wearable pieces can be machine-washed on a delicate cycle in cool water. Use mesh laundry bags to protect them from snagging. Air-dry flat or on a low-heat setting. Avoid bleach and fabric softener.
Store finished projects away from direct sunlight to prevent fading. Use acid-free tissue paper for wrapping pillows or quilts in storage. Keep them in a cool, dry place away from moisture and pests.
Repurposing vintage sports jerseys transforms nostalgia into something tangible and functional. Whether you're creating a patchwork quilt from multiple jerseys, turning a single piece into a throw pillow, or layering an oversized jersey as a contemporary fashion piece, the process connects you to the memories the jersey holds. At MoonlightWeave, we understand that value, it's why we specialize in transforming vintage memorabilia into handcrafted pieces that celebrate your favorite sports and memories. Start with one jersey, follow the techniques in this guide, and you'll have a one-of-a-kind piece that no mass-produced alternative can match. The fabric, the logo, and the story are all yours.
| Project Type | Time Required | Skill Level | Best For |
|---|---|---|---|
| Throw Pillow | 2-3 hours | Beginner | Single jersey, quick project |
| Patchwork Quilt | 15-20 hours | Intermediate | Multiple jerseys, larger project |
| Shirt-Dress | 1-2 hours | Beginner | Oversized jersey, minimal alteration |
| Framed Jersey | 1-2 hours | Beginner | Valuable or delicate pieces |
| Iron-On Patches | 30 minutes | Beginner | No-sew customization |
Frequently Asked Questions
Q: What can I make out of old sports jerseys?
A: Old jerseys can be transformed into quilts, throw pillows, wall art, shirt-dresses, tote bags, and doormats. You can also frame them as wall decor, use fabric scraps for patchwork projects, or add embroidery and patches for customization. No-sew methods like fabric glue and iron-on transfers work for simpler projects if you lack sewing skills.
Q: How do I clean vintage jerseys before repurposing them?
A: Hand wash vintage jerseys in cool water with mild detergent to preserve the mesh fabric and team logos. Avoid bleach and hot water, which can damage polyester. Air dry flat to prevent shrinking. For stubborn stains, spot-treat gently. Always test detergent on a hidden area first. Proper cleaning preserves the fabric quality for your upcycling project.
Q: What are the best sewing techniques for jersey mesh fabric?
A: Use ballpoint or stretch needles designed for knit fabrics to avoid snagging mesh. Choose polyester or nylon thread for durability. Stabilize the fabric with tear-away stabilizer underneath to prevent puckering. Use a stretch stitch or narrow zigzag instead of straight stitches. Start with slow speeds and test on fabric scraps first to master handling athletic mesh.
Q: How do I preserve the fabric of a vintage jersey for upcycling?
A: Store jerseys in a cool, dry place away from direct sunlight to prevent fading. Use acid-free tissue paper if storing long-term. Handle carefully when cutting to avoid snagging the mesh. Keep original team logos and graphics intact as focal points in your projects. Avoid harsh chemicals and high heat during cleaning and construction to maintain the vintage appeal.
This article was written using GrandRanker