

Table of Contents
- What You'll Need Before You Start
- How Many Shirts for a Twin Size Quilt (and Other Sizes)
- Preparing and Cutting Your Sports T-Shirts
- The Best Stabilizer for T-Shirt Quilts
- T-Shirt Quilt Layout Ideas for Sports Fans
- Sewing Your Memory Blanket: Step-by-Step Assembly
- DIY vs. Professional: Cost and Time for a Memory Blanket
- Frequently Asked Questions
Last Updated: September 27, 2026
What You'll Need Before You Start
Making a memory blanket from old sports t-shirts turns a drawer full of jerseys into something you actually use. This guide from MoonlightWeave walks you through every step, from picking shirts to finishing the quilt. A memory blanket is a quilt made from clothing that holds personal meaning, sewn together so the fabric stays usable instead of sitting in a box.
Gather these supplies first:
- 12 to 20 sports t-shirts, clean and dry
- Fusible interfacing, lightweight to medium weight
- Rotary cutter, self-healing mat, and acrylic ruler
- Square template, 12x12 or 15x15 inches
- Sewing machine with a walking foot
- Cotton or poly-cotton backing fabric
- Quilt batting, low loft
- Thread, pins, and quilt binding
How Many Shirts for a Twin Size Quilt (and Other Sizes)
A twin size quilt needs about 20 shirts cut into 12-inch squares, arranged in a 4x5 grid. That gives you a finished blanket around 48x60 inches, big enough to drape over a twin bed.
Here's how shirt counts break down by size:
| Quilt Size | Grid | Shirts Needed | Finished Size |
|---|---|---|---|
| Lap throw | 3x4 | 12 | 36x48 in |
| Twin | 4x5 | 20 | 48x60 in |
| Full | 5x6 | 30 | 60x72 in |
| Queen | 6x7 | 42 | 72x84 in |
Preparing and Cutting Your Sports T-Shirts
Cutting is where most first-timers stall out. The fabric stretches, the logo won't center, and suddenly you're second-guessing the whole project. Here's how to keep it simple.
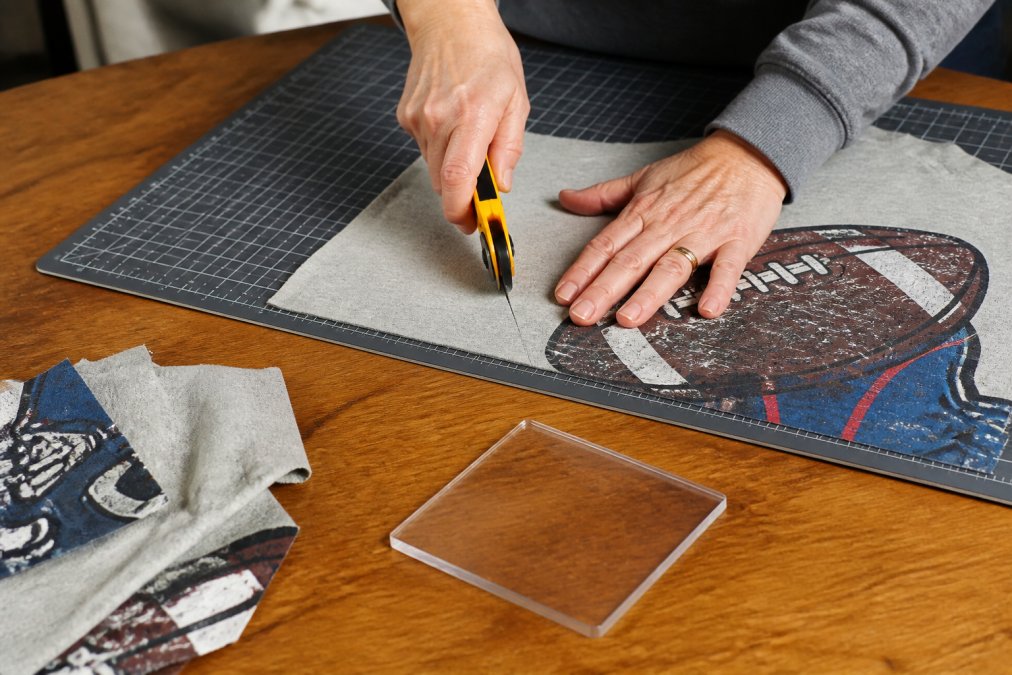
Cutting Squares with a Rotary Cutter and Template
Center your template over the logo, then trace around it with a fabric marker. Slide a self-healing mat under the shirt and cut along the line with your rotary cutter. Press down firmly and cut in one smooth pass. Sawing back and forth frays the edges and throws off your square.
Stabilizing Stretch Fabric with Fusible Interfacing
Fusible interfacing is a stiffening material that bonds to fabric with heat, and it's the step that separates a blanket that lasts from one that warps. Jersey knit stretches and curls, so raw t-shirt squares won't hold their shape through cutting, piecing, or washing. Cut a piece of interfacing slightly smaller than each square, place it bumpy-side down on the back of the shirt, and press with an iron using no steam.
The Best Stabilizer for T-Shirt Quilts
The best stabilizer for t-shirt quilts is a lightweight fusible tricot interfacing, typically in the 1.5 to 2.5 oz per square yard range. That weight range adds just enough body to stop jersey knit from stretching without turning the finished blanket stiff or cardboard-like. Heavier weights (3 oz and up) are built for structured projects like tote bags and will make a memory blanket feel like a board.
Match the Interfacing Weight to the Shirt
Not every sports t-shirt behaves the same. A thin, well-worn cotton jersey from the 1990s drapes and stretches differently than a modern polyester performance tee with a heat-pressed logo. Use this guide:
| Shirt Type | Recommended Interfacing | Why |
|---|---|---|
| Thin vintage cotton jersey | Lightweight fusible tricot (1.5-2 oz) | Adds body without stiffening an already-delicate fabric |
| Standard cotton/poly blend tee | Lightweight to medium fusible tricot (2-2.5 oz) | Balances stability with drape |
| Heavyweight or performance polyester | Medium fusible tricot (2.5-3 oz) | Resists the extra stretch and slick hand of synthetic knits |
| Mesh or practice jersey | Lightweight fusible tricot plus a woven stay strip along the cut edge | Mesh has almost no structural memory on its own |
Fusible vs. Sew-In vs. Spray Adhesive
Fusible tricot is the default for t-shirt quilts because the heat-activated adhesive bonds directly to the jersey and locks the knit in place before you ever touch the sewing machine. Sew-in interfacing works, but it shifts during piecing and requires basting every square, which doubles your prep time. Spray adhesive is a temporary fix for quilting the layers together, it is not a substitute for interfacing on stretch fabric.
How to Apply Fusible Interfacing Without Ruining the Print
- Cut the interfacing slightly smaller than your finished square (about 1/2 inch smaller on each side) so the adhesive never touches your sewing machine or ironing board.
- Place the interfacing bumpy-side (adhesive side) down against the back of the shirt.
- Set the iron to the wool or medium-high setting with no steam. Steam causes the adhesive to bubble and the jersey to curl.
- Press, do not glide, for 10 to 15 seconds per section, lifting and repositioning the iron until the whole square is bonded.
- Let each square cool completely flat before stacking. Warm squares will fuse to each other.
Signs You Bought the Wrong Interfacing
- The square feels like a cracker after cooling, you went too heavy.
- The interfacing peels at the corners after one wash, you bought a low-quality fusible with weak adhesive.
- The jersey still curls at the edges during piecing, you went too light or skipped the interfacing entirely.
- The print looks glossy or melted, your iron was too hot or you used steam.
A common pattern among first-time quilt makers is buying the cheapest fusible on the shelf. Thin, low-quality interfacing peels after a few washes, and once it lifts, the square underneath curls at the corners. Spend the extra few dollars per yard on a name-brand tricot and the blanket will hold its shape for years.
T-Shirt Quilt Layout Ideas for Sports Fans
Layout is where a memory blanket becomes personal. Before you sew anything, lay all your squares on the floor and move them around until the arrangement feels right.
Try one of these approaches:
- Chronological: Oldest jersey top-left, newest bottom-right, like a timeline of seasons.
- By team: Group hockey, football, and baseball shirts into their own rows.
- Color-blocked: Alternate light and dark shirts for a checkerboard effect.
- Center spotlight: Put the most meaningful shirt in the middle and build outward.
Sewing Your Memory Blanket: Step-by-Step Assembly
Sewing a memory blanket takes patience, but the process is straightforward once your squares are stabilized. Work in rows, then join the rows together.
- Pin squares into rows. Place two squares right sides together and pin along one edge.
- Sew with a walking foot. Use a 1/4-inch seam allowance and a zigzag stitch. The walking foot feeds stretch fabric evenly so it doesn't pucker.
- Press seams open. Press each seam flat before adding the next square.
- Join the rows. Sew completed rows together the same way, matching seams as you go.
- Add batting and backing. Layer backing, batting, and quilt top, then baste all three together.
- Quilt the layers. Stitch across the blanket to hold everything in place. Straight lines or a simple grid work fine.
- Attach binding. Sew binding around the edges and fold it over to finish.
DIY vs. Professional: Cost and Time for a Memory Blanket
Making your own memory blanket is the better choice when you want control over the design and you're working with shirts that matter to you. A professional service is the better choice when the shirts are fragile, valuable, or you simply don't have the time. The real decision comes down to three numbers: material cost, hours invested, and the replacement value of the shirts you're cutting.
Material Cost Breakdown for a Twin-Size (20-Shirt) Blanket
These are typical retail prices for materials bought new at a craft or fabric store. Prices vary by region and sales.
| Material | Quantity for 20-Shirt Twin | Typical Cost |
|---|---|---|
| Fusible tricot interfacing | 5-6 yards | $25-$40 |
| Backing fabric (cotton or poly-cotton, 108 in wide) | 2 yards | $20-$35 |
| Low-loft quilt batting | 1 twin-size package | $15-$25 |
| Quilt binding (pre-made or cut from yardage) | 1 package or 1/2 yard | $8-$15 |
| Thread (quality cotton or poly) | 1-2 spools | $6-$12 |
| Rotary blade, needles, pins (amortized) | , | $5-$10 |
| Total materials | $79-$137 |
Time Investment, Broken Down by Stage
| Stage | Hours (20-Shirt Twin) |
|---|---|
| Washing, drying, and pressing shirts | 1-2 |
| Cutting squares and applying interfacing | 3-5 |
| Arranging layout | 0.5-1 |
| Sewing rows and joining rows | 3-5 |
| Basting, quilting, and binding | 3-5 |
| Total | 10.5-18 hours |
At a modest $20 per hour of your own time, that's $210-$360 in labor on top of materials. Most people don't count their own time, but it's worth knowing before you start.
What Professional Services Typically Charge
Professional memory-blanket makers generally price by the number of shirts and the finished size. For a 20-shirt twin-size quilt, expect to pay in the range of $300-$600, with premium shops charging more for complex layouts, sashing, or embroidery. Turnaround is commonly 4-8 weeks, and rush options usually add a fee.
The Decision Framework
Choose DIY if:
- The shirts are replaceable or you have duplicates.
- You enjoy the process and want full control over layout, color, and finishing.
- You already own the tools and have 10-18 hours to invest.
- Your total budget is under $150.
Choose a professional if:
- Any shirt is game-worn, autographed, or otherwise one-of-a-kind.
- The fabric is fragile, stained, or already deteriorating.
- You need the blanket by a specific date (graduation, anniversary, memorial).
- Your time is worth more to you than the $300-$600 service fee.
A Middle Path: Hybrid Approach
You can cut and interface the squares yourself, the two most time-consuming and error-prone steps, then hand the stabilized squares to a longarm quilter for assembly, quilting, and binding. Longarm quilting services typically charge by the square inch or by the row, and many will accept pre-cut, pre-fused squares. This hybrid keeps your material cost low, preserves your design control, and offloads the step that requires the most expensive equipment.
Frequently Asked Questions
How many shirts does it take to make a memory blanket?
The number of shirts you need depends on the finished size. For a throw blanket, 12 to 20 shirts is typical. A twin size quilt usually requires 20 to 30 shirts, depending on the size of your cut squares and whether you include sashing. Gather all your shirts first, then lay them out to see how many you have before deciding on a final size.
Can you make a memory blanket without sewing?
Yes. A no-sew memory blanket uses fusible interfacing and fabric glue or iron-on adhesive to join squares. This method works well for a wall hanging or a lightweight throw, but it is less durable than a sewn quilt and may not hold up to regular washing. For a blanket that gets daily use, sewing with a zigzag stitch or walking foot gives you a stronger result.
What is the best stabilizer to use for t-shirt quilts?
A lightweight fusible interfacing, often called a stabilizer, is the best choice for t-shirt quilts. It prevents jersey knit from stretching and keeps your squares from fraying. Look for a product labeled for knit fabrics and follow the manufacturer's instructions for iron temperature and pressing time. Always test on a scrap piece first to check for bubbling or discoloration.
How do you arrange sports t-shirts for a quilt layout?
Start by grouping shirts by team, color, or era. A grid layout with equal-sized squares is the simplest. For a more dynamic look, try a center medallion with your most prized jersey in the middle, or use sashing strips between squares to separate busy logos. Lay everything on a large floor or design wall and photograph the arrangement before you sew so you can remember the order.